Hi crafty friends! It’s time for the Reverse Confetti November Release Blog Hop!
Also I am happy to announce that we are collaborating with Tracey McNeely and her team for her annual 25 days of Christmas Tags. I'll be sharing my tags using some of the new goodies with you in just a moment.
Our new release is fabulous!
I love pulling together all my sets to find new combinations to use them, and today I decided to bring out all the little cute guys!
My favorite set from this release is Birdie Buddies. So I stamped the images in a black hybrid ink and colored them up with copic markers. I die cut the images out with the Birdie Buddies Confetti Cuts.
For my layout, I framed it overhand with the foliage, also stamped two of them in black hybrid ink and colored with copic markers. I die cut these out with their coordinating dies.
I created a cloud ink blended background with Baby Blue and Island Blue Dye Inks and also die cut a curved snowy hill out of white glitter card stock.
For the front layer, I used Neenah Desert Storm card stock. I trimmed a small piece for the top, and a larger piece for the bottom. And then I embossed the panels using new Snow Stars Cover Panel Confetti Cuts. I deliberately did not want to cut the details completely, just give the texture to the background. On the lower panel, I stamped the sentiment from the Christmas Candles stamp set. I love the large font.
With all the pieces ready, I can now finally assemble it al together, with the mini scene built and the branches and front panel framing it, and the sentiment right below. Whew! That was a lot!
And here you can see my Christmas tags.
I wanted to do something special, a non-standard form.
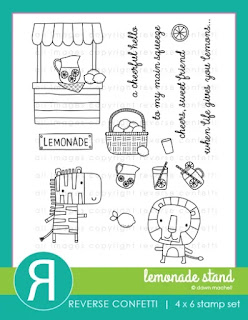
So as a basis for tags I used a stamp in the form of a lemonade stand from the Lemonade Stand stamp set. But I transformed it into a new year's stand.
For my tags I used new Birdie Buddies and Huggable stamp sets. As always I prepared all the details, colored the images with my Copic markers.
I added all the images and the sentiments to the tag base with foam tape. I made the basis for the tags in the form of a card, so you can write a small wish inside. I cut it out with a coordinating die to the lemonade stand in a partial die cutting technique.


so perfect!
ОтветитьУдалитьDear Olga
ОтветитьУдалитьYour card and tags are very pretty. blessings tgo you and your family