Показаны сообщения с ярлыком box. Показать все сообщения

2022-02-04

C. C. DESIGNS FEBRUARY RELEASE BLOG HOP

We are celebrating the arrival of 3 NEW critter stamp sets. The Design Team has been giving you previews all week and now we are sharing our BEST creations to inspire you to shop and create with C.C Designs!

Hop along for your chance to WIN one of two $15 G.C to the store! We will pull one from Instagram and one from the blog comments.

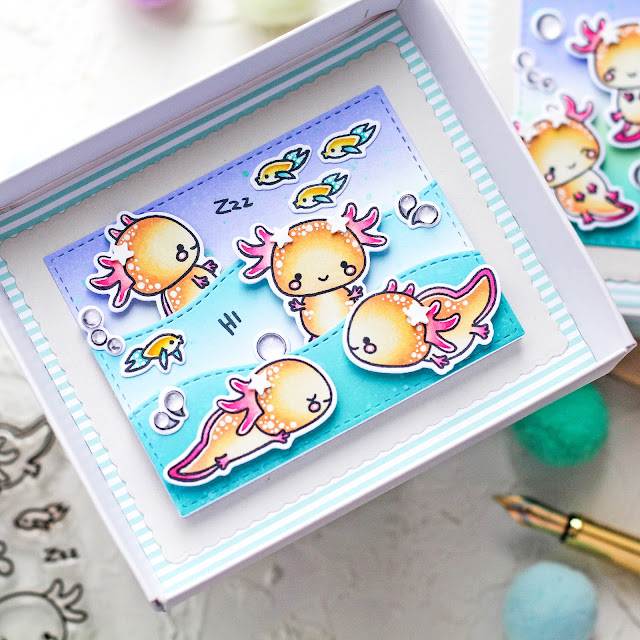
For this day I decided to make this box to create a mini diaroma like scene and it looks so fun!
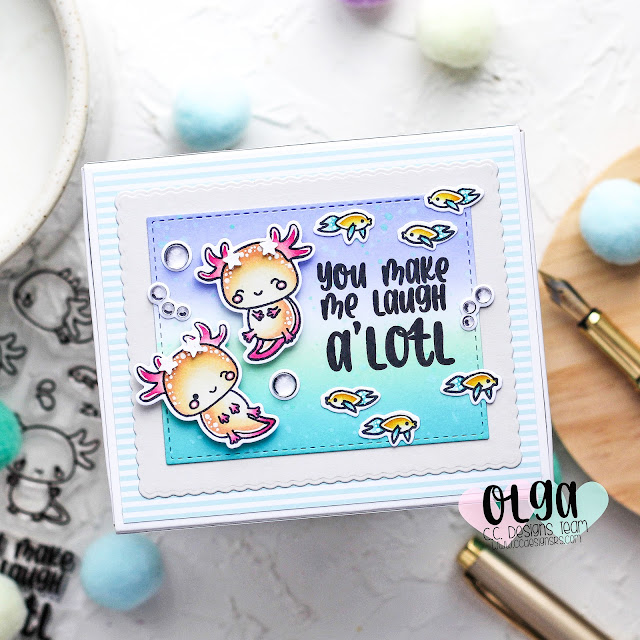

I stamped and colored several images from the new Axolotl Clear Stamp Set and used the Axolotl Outline Die to die cut them out.
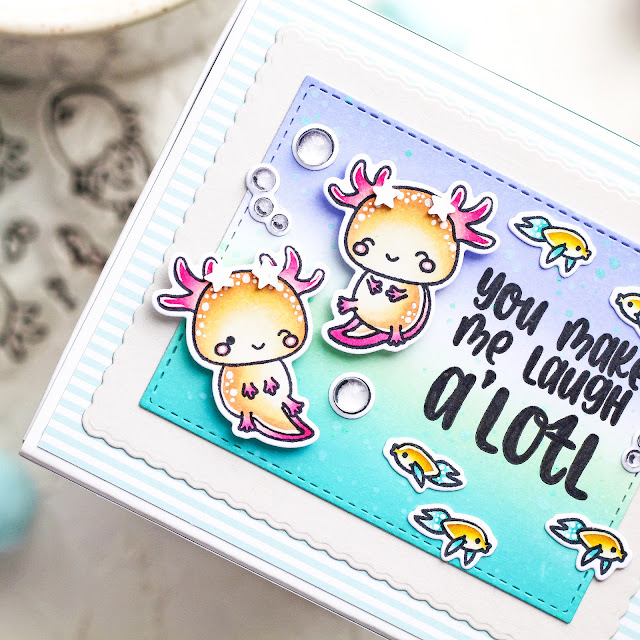

I hand made this box and die cut all the various scenic pieces for my scene with various cardstock scraps. I also create the cover or wrap. I die cut that with some pattern paper and the scallop piece out of light grey card stock and I stamped the sentiment.
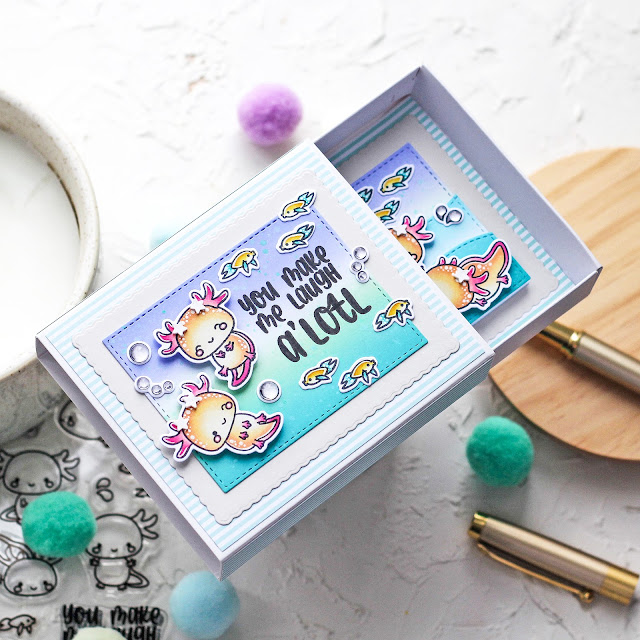


After my scene is done, tuck it back in to the wrap that was decorated early and now it’s ready for a recipient!

You should have come from the “Tamara Potocnik” NEXT UP is “Kerri Boucher
 
Here is the full line up:
C.C Designs Blog @ccdesignsrs
Meghan Kennihan @MadebyMeghanK
Emma Ireland @emmascraftycards
Maria Russell @rprmlr77
Cindy Beland @cindy.beland
Tamara Potocnik @handmadebytamara 
Olga Moss @olga_moss - you are here
Kerri Boucher @kerri1974mar
Cristena Bagne @copictopia
Cari Scharping @creaturecomfortcards
 
To enter:
1. Subscribe to the Design Team Blogs, Instagram, & YouTube Channels
2. Leave a Comment
3. Tag your friends for bonus entries
 
Entries will be accepted until Wednesday February 9th, Winners will be announced on the C.C Designs Blog and FB Page on Friday February 11th.

2021-05-08

REVERSE CONFETTI MAY RELEASE BLOG HOP


Hi crafty friends! It’s time for the Reverse Confetti May Release Blog Hop


I am happy to announce that all of the goodies in the new release are 


So for today I created a super fun interactive swing shadow box card using super adorable set called The Bear Up There.


I started by stamping out the images and I colored them in using Copic markers. Then, I cut out according to my own scheme the main part of the shadow box twice using my scissors and cutter and I made sure to cut a window into one of them. 
I also added the clouds using Head in the Clouds Cover Panel Confetti Cuts - it's the pieces of it. I cut down one cloud into two thin strips to form shelves for the top swing mechanism.


Then I ink blended the main shadow box and splattered it all with watercolors, white gouache and gold acrylic paint. After that, I ink blended the clouds and the shelves for the top of the box. 


Then it was time to assemble my shadow box. To create the swing mechanism I used a strip from a thick acetate. I rounded the corners at the top, added a hole using a hole punch and glued my cute bear onto it. Then I used a Spin & Slide Disc and added double sided tape to both sides. I adhered it to the back of the box, then looped my strip of acetate around it and added a slightly bigger circle of cardstock to close the mechanism. Now our bear can swing freely – It’s just such a fun effect! 

To finish the card I added the rest of my images and die cuts to the shadow box. To make the inside a bit more interesting, I added images here too.


Thank you so much for visiting my blog! 
I really hope you enjoyed it and I will see you again soon! 
Have a wonderful day!

2015-04-12

пасхальное сообщение

Всем доброго воскресного дня! Начну с того, что поздравляю всех с праздником Святой Пасхи. 


2014-12-28

новогодняя фоторамка

В последнее время очень модно стало оформлять различные коробочки, баночки или шадоубоксы под фоторамки. В интернете вы можете найти различные МК по изготовлению таких  коробоочек. Вот тут http://oblacco.com/post323860988# я нашла хороший обзор по вопросу о шадоубоксу. Это очень интересная и необычная альтернатива, на мой взгляд. Причем тематика не имеет никакого значения: можно сделать такое интерьерное украшение к какому-либо празднику, в подарок или просто для красоты на полочку.
Сегодня я хочу показать, как это делала я. Я не изобретаю ничего нового - а показываю лишь ход своих действий. Такие подгляделки.
Скоро Новый Год, поэтому мой вариант - новогодний. Для этого я взяла фото сына с детсадовского утренника. Ваш вариант может быть и другим. Я видела, что такие коробочки делают и с изображением Деда Мороза.
Итак, я взяла белую акриловую краску и покрыла ей коробочку по боковинам, сзади и немного внутри, только ту часть, которую будет в итоге видно.

2011-01-19

Фонарь

Сегодня хочу показать свою импровизацию старинного кованого фонаря. Сделала его уже давно, а вот сфотографировать удалось только на днях.

с разных сторон


детальки


Надеюсь моя работа была вам интересна. Спасибо, что все просмотрели;)!
По материалам: кардсток с текстурой льна, цветочки, брадсы, пудра, кракелюр, спрей и клей-акцент с блестками.

2010-08-08

Свадебное

Лето-пора свадеб. В этом году удалось и мне принять в нем участие. У меня есть вот эти две работы

2010-05-05

Бабочковое настроение

Вот такая шкатулочка у меня недавно родилась