To help celebrate 8th birthday, Reverse Confetti offering a new FREE WITH PURCHASE stamp set.
This stamp set will be sent to you at no charge when you make a purchase of $60+ (prior to adding this set) AND add it to your cart. All details will be on the product page. We've also brought back our previous FREE WITH PURCHASE SETS in case you missed out on those (one per order).
Today we are showcasing:
HAVE YOUR CAKE
Coordinating Confetti Cuts die set
BEAUTIFUL BALLOONS
Coordinating Confetti Cuts die set
Today I present to you two new cards where I used each of the new sets. They're just awesome, aren't they ?!
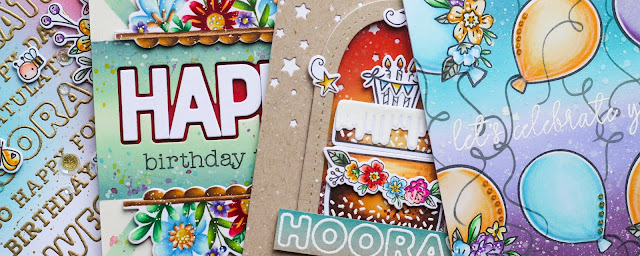
In this card I used a new HAVE YOUR CAKE stamp set with its Coordinating Confetti Cuts die set. With this wonderful set, you can create your own cake and even your hands will stay clean! haha

As always I started with preparing all the details of the card. I stamped several tiers of the image of the cakes for my cake and colored them in the color of the chocolate dough using my copics. Then I cut them all with Coordinating Confetti Cuts die set. Next I heat embossed in white icing for cake decorating. I also added some decor for the cake like flowers, candles and flags. I think my cake looks delicious!
I wanted to put the cake in a glass dome like we do in real life. So I took for this Rounded Stitched Window Confetti Cuts.
At first I made a star background using kraft cardstock and All the Stars Confetti Cuts. Then I blended orange and yellow ink shades onto white piece of cardstock. After ink blending I splattered my panel with white paint. Then I made a shaker. To do this, I glued seven layers of cut frames to get a container for the shaker. This, in my opinion, is the easiest and fastest way to make a shaker.
Next, I mounted the images on top of the shaker panel with glue. Lastly, I embossed the sentiment HOORAY from new HOORAY | FREEBIE SET in white on a tiny stripe of the cardstock and adhered it down dome. I also added a handle for the dome using one of the tags from the Three Tags Confetti Cuts. To decorate the card I used a little stars from the Joyous Holiday stamp set.
It's time for my second card. Here I used a new BEAUTIFUL BALLOONS stamp set. This is one-layer card. Therefore, the process of working here is very simple.
I just stamped a lot of balloons, covered them with pre-prepared masks on top and blended purple and blue inks. Then I removed the masking paper from the balloon images and colored them.
To decorate the card I glued some beads on the top of the balloons. That is all!
Hope you enjoyed today’s projects!
Thanks so much for stopping by!


