Показаны сообщения с ярлыком interactive. Показать все сообщения

2023-02-15

PAWSOME STAMPS SNEAK PEEK DAY 5

Hi there, friends. 
Today I want to share with you this card with new beautiful Loving Thoughts stamp set from Pawsome Stamps.


First, I stamped and colored this bouquet with copic markers. Then I made highlights using white gel pen. Next I took two panels of white cardstock. And I cut out a window in the upper panel. I inked the lower panel with Speckled Egg Distress Oxide Ink and Uncharted Mariner Distress Ink. I added some white splatters. Next I made a shaker using my upper panel and  the lower panel together. Filled it with some sequins.


Finally I placed all the elements on the shaker panel.


Thank you so much for join me today, have a great day!

2022-02-04

C. C. DESIGNS FEBRUARY RELEASE BLOG HOP

We are celebrating the arrival of 3 NEW critter stamp sets. The Design Team has been giving you previews all week and now we are sharing our BEST creations to inspire you to shop and create with C.C Designs!


Hop along for your chance to WIN one of two $15 G.C to the store! We will pull one from Instagram and one from the blog comments.

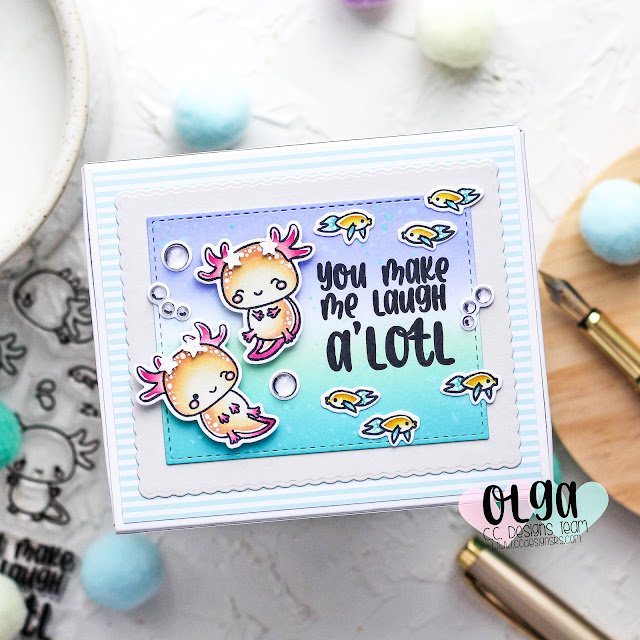
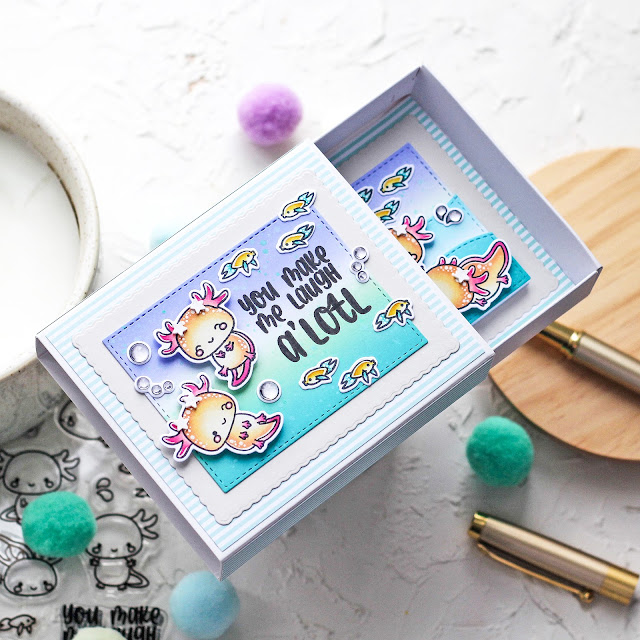
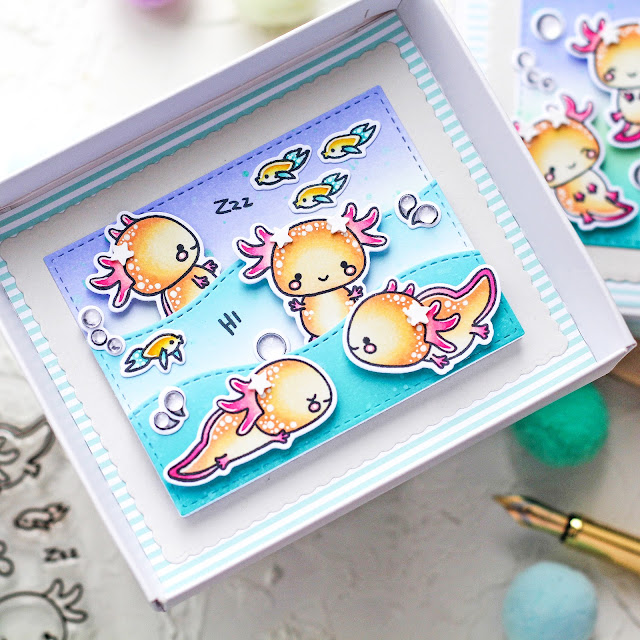
For this day I decided to make this box to create a mini diaroma like scene and it looks so fun!


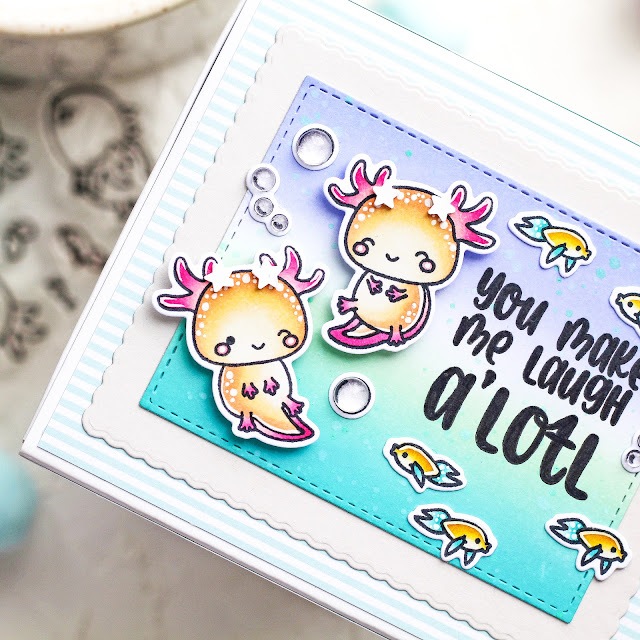
I stamped and colored several images from the new Axolotl Clear Stamp Set and used the Axolotl Outline Die to die cut them out.


I hand made this box and die cut all the various scenic pieces for my scene with various cardstock scraps. I also create the cover or wrap. I die cut that with some pattern paper and the scallop piece out of light grey card stock and I stamped the sentiment.


After my scene is done, tuck it back in to the wrap that was decorated early and now it’s ready for a recipient!


You should have come from the “Tamara Potocnik” NEXT UP is “Kerri Boucher”
 
Here is the full line up:
C.C Designs Blog @ccdesignsrs
Meghan Kennihan @MadebyMeghanK
Emma Ireland @emmascraftycards
Maria Russell @rprmlr77
Cindy Beland @cindy.beland
Tamara Potocnik @handmadebytamara 
Olga Moss @olga_moss - you are here
Kerri Boucher @kerri1974mar
Cristena Bagne @copictopia
Cari Scharping @creaturecomfortcards
 
To enter:
1. Subscribe to the Design Team Blogs, Instagram, & YouTube Channels
2. Leave a Comment
3. Tag your friends for bonus entries
 
Entries will be accepted until Wednesday February 9th, Winners will be announced on the C.C Designs Blog and FB Page on Friday February 11th.

SHAKER CARD WITH MOON MEN FOR THE REVERSE CONFETTI

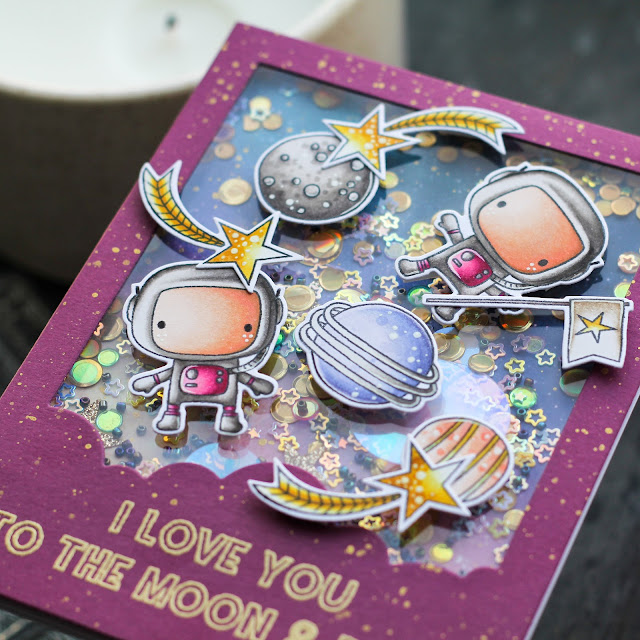
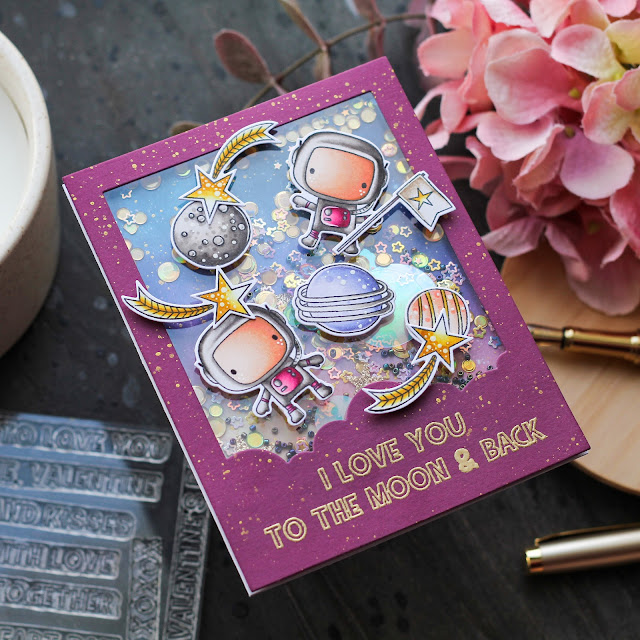
Hello, friends! I am on the  Reverse Confetti Blog with my new card. It's all about love this time. So why not to create a cute card about endless love with wonderful moon men? 


I stamped the images from Moon Men stamp set in black hybrid ink and colored them with my alcohol markers. Next I die cut the images out with the  Moon Men Confetti Cuts. 


Next I made a space background. And I die cut a panel with a scalloped cloud line and an open center using Head in the Clouds Cover Panel Confetti Cuts from the Grape Soda Cardstock.


Once that was done, I heat embossed the sentiment from the Words of Love stamp set in gold and I made a shaker. And I placed the images on the shaker panel. All finished!


Hope you enjoyed the products featured in today’s post!
Thanks so much for stopping by!

2022-01-31

SHAKER CARD WITH SKUNKS FOR C.C. DESIGNS

Hello friends! I'm up on the C.C. Designs Blog sharing with you this shaker card where I used absolutely amazing Skunk Clear Stamp Set.


I stamped the images in black hybrid ink and colored them with my alcohol markers. Next I die cut the images out with the  Skunk Outline Die. For the front layer, I die cut the big frame,for the bottom layout, I created an ink blended background in pink and yellow colors. I stamped the sentiment on the background in black.


With all the pieces ready, I can now finally assemble it al together in shaker. And I placed the images on the shaker panel. 


Hope you enjoyed today’s project! 
Thanks so much for stopping by!

2021-05-25

Just Quillin` card for Crafty Meraki


Hello friends! Today is my first time on the Crafty Meraki blog. I want to say that I am very happy and I hope we will have fun together! 
Today I 'm sharing a sweet and fun interactive slimline card featuring awesome Just Quillin` stamp set from the new release.

I started by stamping all the images using Memento Tuxedo Black Ink Pad. I colored them using Copic Markers and cut them out (coordinating dies available here). I added some highlights using white gel pen.


I wanted to give several places for me to place the hedgehogs so I used the homemade grass stencil to ink blended several layers. I used there Twisted Citron Distress Ink. To create a part of the sky, I used the same stencil and blended here Broken China Distress Ink. Additionally, I sprinkled drops of water on top.


Next I used the slider die, put it in place, and ran it through my die cut machine. I added a penny behind the slot, added a small foam dot to the penny and adhered the hedgehog on top. I then adhered the grass border to my background panel using foam tape. I also adhered the rest of the images. This is going to be my front panel. Now you can see the hedgehog slide back and forth!


Next I stamped the sentiment “You need Quill Power”. Finally, I adhered my front panel to a white card stock and then adhered it to my back panel using foam tape.

Thank you so much for stopping by! I hope you had fun and feel inspired by the card I’ve shared with you today! Make sure to visit Crafty Meraki store here to check all the amazing products from the new release! Have a wonderful day!

2021-05-08

REVERSE CONFETTI MAY RELEASE BLOG HOP


Hi crafty friends! It’s time for the Reverse Confetti May Release Blog Hop! 


I am happy to announce that all of the goodies in the new release are 


So for today I created a super fun interactive swing shadow box card using super adorable set called The Bear Up There.


I started by stamping out the images and I colored them in using Copic markers. Then, I cut out according to my own scheme the main part of the shadow box twice using my scissors and cutter and I made sure to cut a window into one of them. 
I also added the clouds using Head in the Clouds Cover Panel Confetti Cuts - it's the pieces of it. I cut down one cloud into two thin strips to form shelves for the top swing mechanism.


Then I ink blended the main shadow box and splattered it all with watercolors, white gouache and gold acrylic paint. After that, I ink blended the clouds and the shelves for the top of the box. 


Then it was time to assemble my shadow box. To create the swing mechanism I used a strip from a thick acetate. I rounded the corners at the top, added a hole using a hole punch and glued my cute bear onto it. Then I used a Spin & Slide Disc and added double sided tape to both sides. I adhered it to the back of the box, then looped my strip of acetate around it and added a slightly bigger circle of cardstock to close the mechanism. Now our bear can swing freely – It’s just such a fun effect! 

To finish the card I added the rest of my images and die cuts to the shadow box. To make the inside a bit more interesting, I added images here too.


Thank you so much for visiting my blog! 
I really hope you enjoyed it and I will see you again soon! 
Have a wonderful day!

2020-01-20

Reverse Confetti LOVE lollipop holders

Hello friends! I'm so happy that I finally got my package with the new release from Reverse Confetti. 
And in these four days I will share with you my ideas for using it! 
So be sure to check in with me! 
I will be very happy to see you here!


I absolutely love our new products! 
They coordinate so well together! It was so much fun working with this release! So for today I made these love lollipop holders. 


These projects was created with the Square Window Tag Confetti Cuts. The little critters was stamped and cut out with the coordinating die from the Huggable stamp set. I stamped and cut out three large words that are from the new gorgeous All the Love stamp set. 


I cut out six large tags using Square Window Tag Confetti Cuts in an Sweet as Sugar 6x6 Paper Pad. And I put them together by gluing another piece of paper at the bottom. So I got a bag for a lollipop. The stick is fixed using round slots at the top of the tags and held there securely. 


I then embellished the top with a pretty red hearts using Hearts Confetti Cuts.Then I added the cute little critters in the center.


Next, I stamped and cut out the big words "Love" & "Xoxo" in white card stock. I added it on the top of the lollipop holder. Once everything was done, I tied it up with some twine. Now it is all ready to be a lovely treat for someone!


Thank you so much for stopping by!